Hi D365 Lovers,
In this article, I am going to explain about extensions and will show you how you can create an extension for your D365 Business Central product. I will be using the development environment for Microsoft Dynamics 365 Business Central, which is Visual Studio Code. Before going to create extension let’s first know more about extensions:
What is an extension?
All the functionality in Microsoft Dynamics 365 Business Central is coded in objects. If you want to modify existing objects (like tables, pages, etc.) you have to create extensions. Extensions are a programming model, which is object-based because NAV and Business Central only have specific objects that you can use to customized and modified the product. You can create new objects, or extend existing objects depending on what you want your extension to do. An extension defines extra functionality to modify the behavior of the Microsoft Dynamics 365 Business Central application.
All objects are stored as code, which is known as AL code (Application Language-code). Every object is saved in files with the .al file extension, and you can even put multiple objects in a single .al file, although it is recommended to use a single file per object. Keeping a single file per object helps a developer to understand how many objects they created for their solution.
By using the AL Language extension for Visual Studio Code, you will get the benefits of a modern development environment along with seamless publishing, debugging and execution integration with Microsoft Dynamics 365 Business Central. When your extension is compiled, you will get a .app package file, which can be deployed to the Microsoft Dynamics 365 Business Central server. You can even submit your extension package to AppSource, where you can offer your solution to thousands of customers worldwide. Deployment of .app package file also required permission.xml when planning to deploy the package on the production environment.
Creating a New Extension
After installing the AL extension in Visual Studio Code, we can start creating extensions for Microsoft Dynamics 365 Business Central. There are two ways to create your extension solution in Visual Studio Code:
Click on View Menu -> Command Palette or
You can use shortcut -> Ctrl+Shift+P
After choosing the command palette type AL from Application Language, and select AL go. Now Visual Studio will ask us for a path where we would like to create our extension.
After providing the path, Visual Studio Code then asks us if we’re going to use a Microsoft Sandbox or a local installation. In my case, I am using Cloud solution so I will choose Microsoft Sandbox Solution. After all, this Visual Studio will ask your credentials to deploy the solution on Sandbox Environment.

Fig 1: Use command palette and choose -> Al:Go -> To Create AL Solution

Fig 2: Enter a path and give name to your AL Project

Fig 3: Choose any release

Fig 4: Choose Microsoft cloud sandbox for cloud tenant

Fig 5: Enter your credential here to authenticate yourself

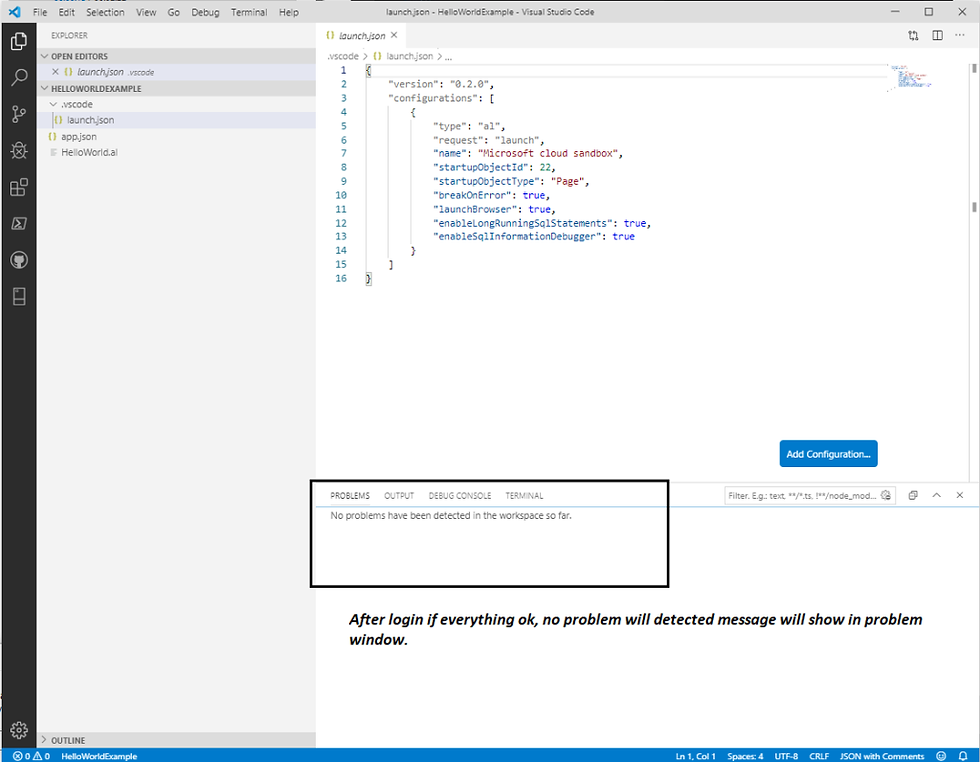
Fig 6: After Login if no problem detected means your solution doesn’t have any issue
Master Note:
Sometimes you will face different issues in your solution project and you can’t able to deploy the solution if you go in output window maybe you will find the following message, related to symbols not downloaded:

Fig 7: Symbols not downloaded -> now you need to change your app.json file to resolve this issue
Do the required changes in the app.json file based on the installed Business Central version sometimes you may face Symbol not downloaded issue you can resolve it by changing the version and removing some extra code and make sure to use lower runtime version

Fig 10: Changes required in app.json file
After doing changes in your app.json file your app.json file may look like below image and after changing the app.json use command palette to download the Symbol. Download Symbol -> Crtl+Shift+P -> AL: Download symbols

Fig 11: All reference symbols downloaded after the change now you good to go to deploy your extension.
I hope you understand how to create an extension using the Visual Studio Code.
In the next articles, I will tell you what are the JSON configuration files in AL projects after that will tell you how you can create a Sandbox Environment and deploy your first extension in Dynamics 365 Business Central that we created in this article and test.
Stay Tuned!


Comments